Creating Employees
One form, three sections — and several things TriblockHR sets up for you behind the scenes.
The create form
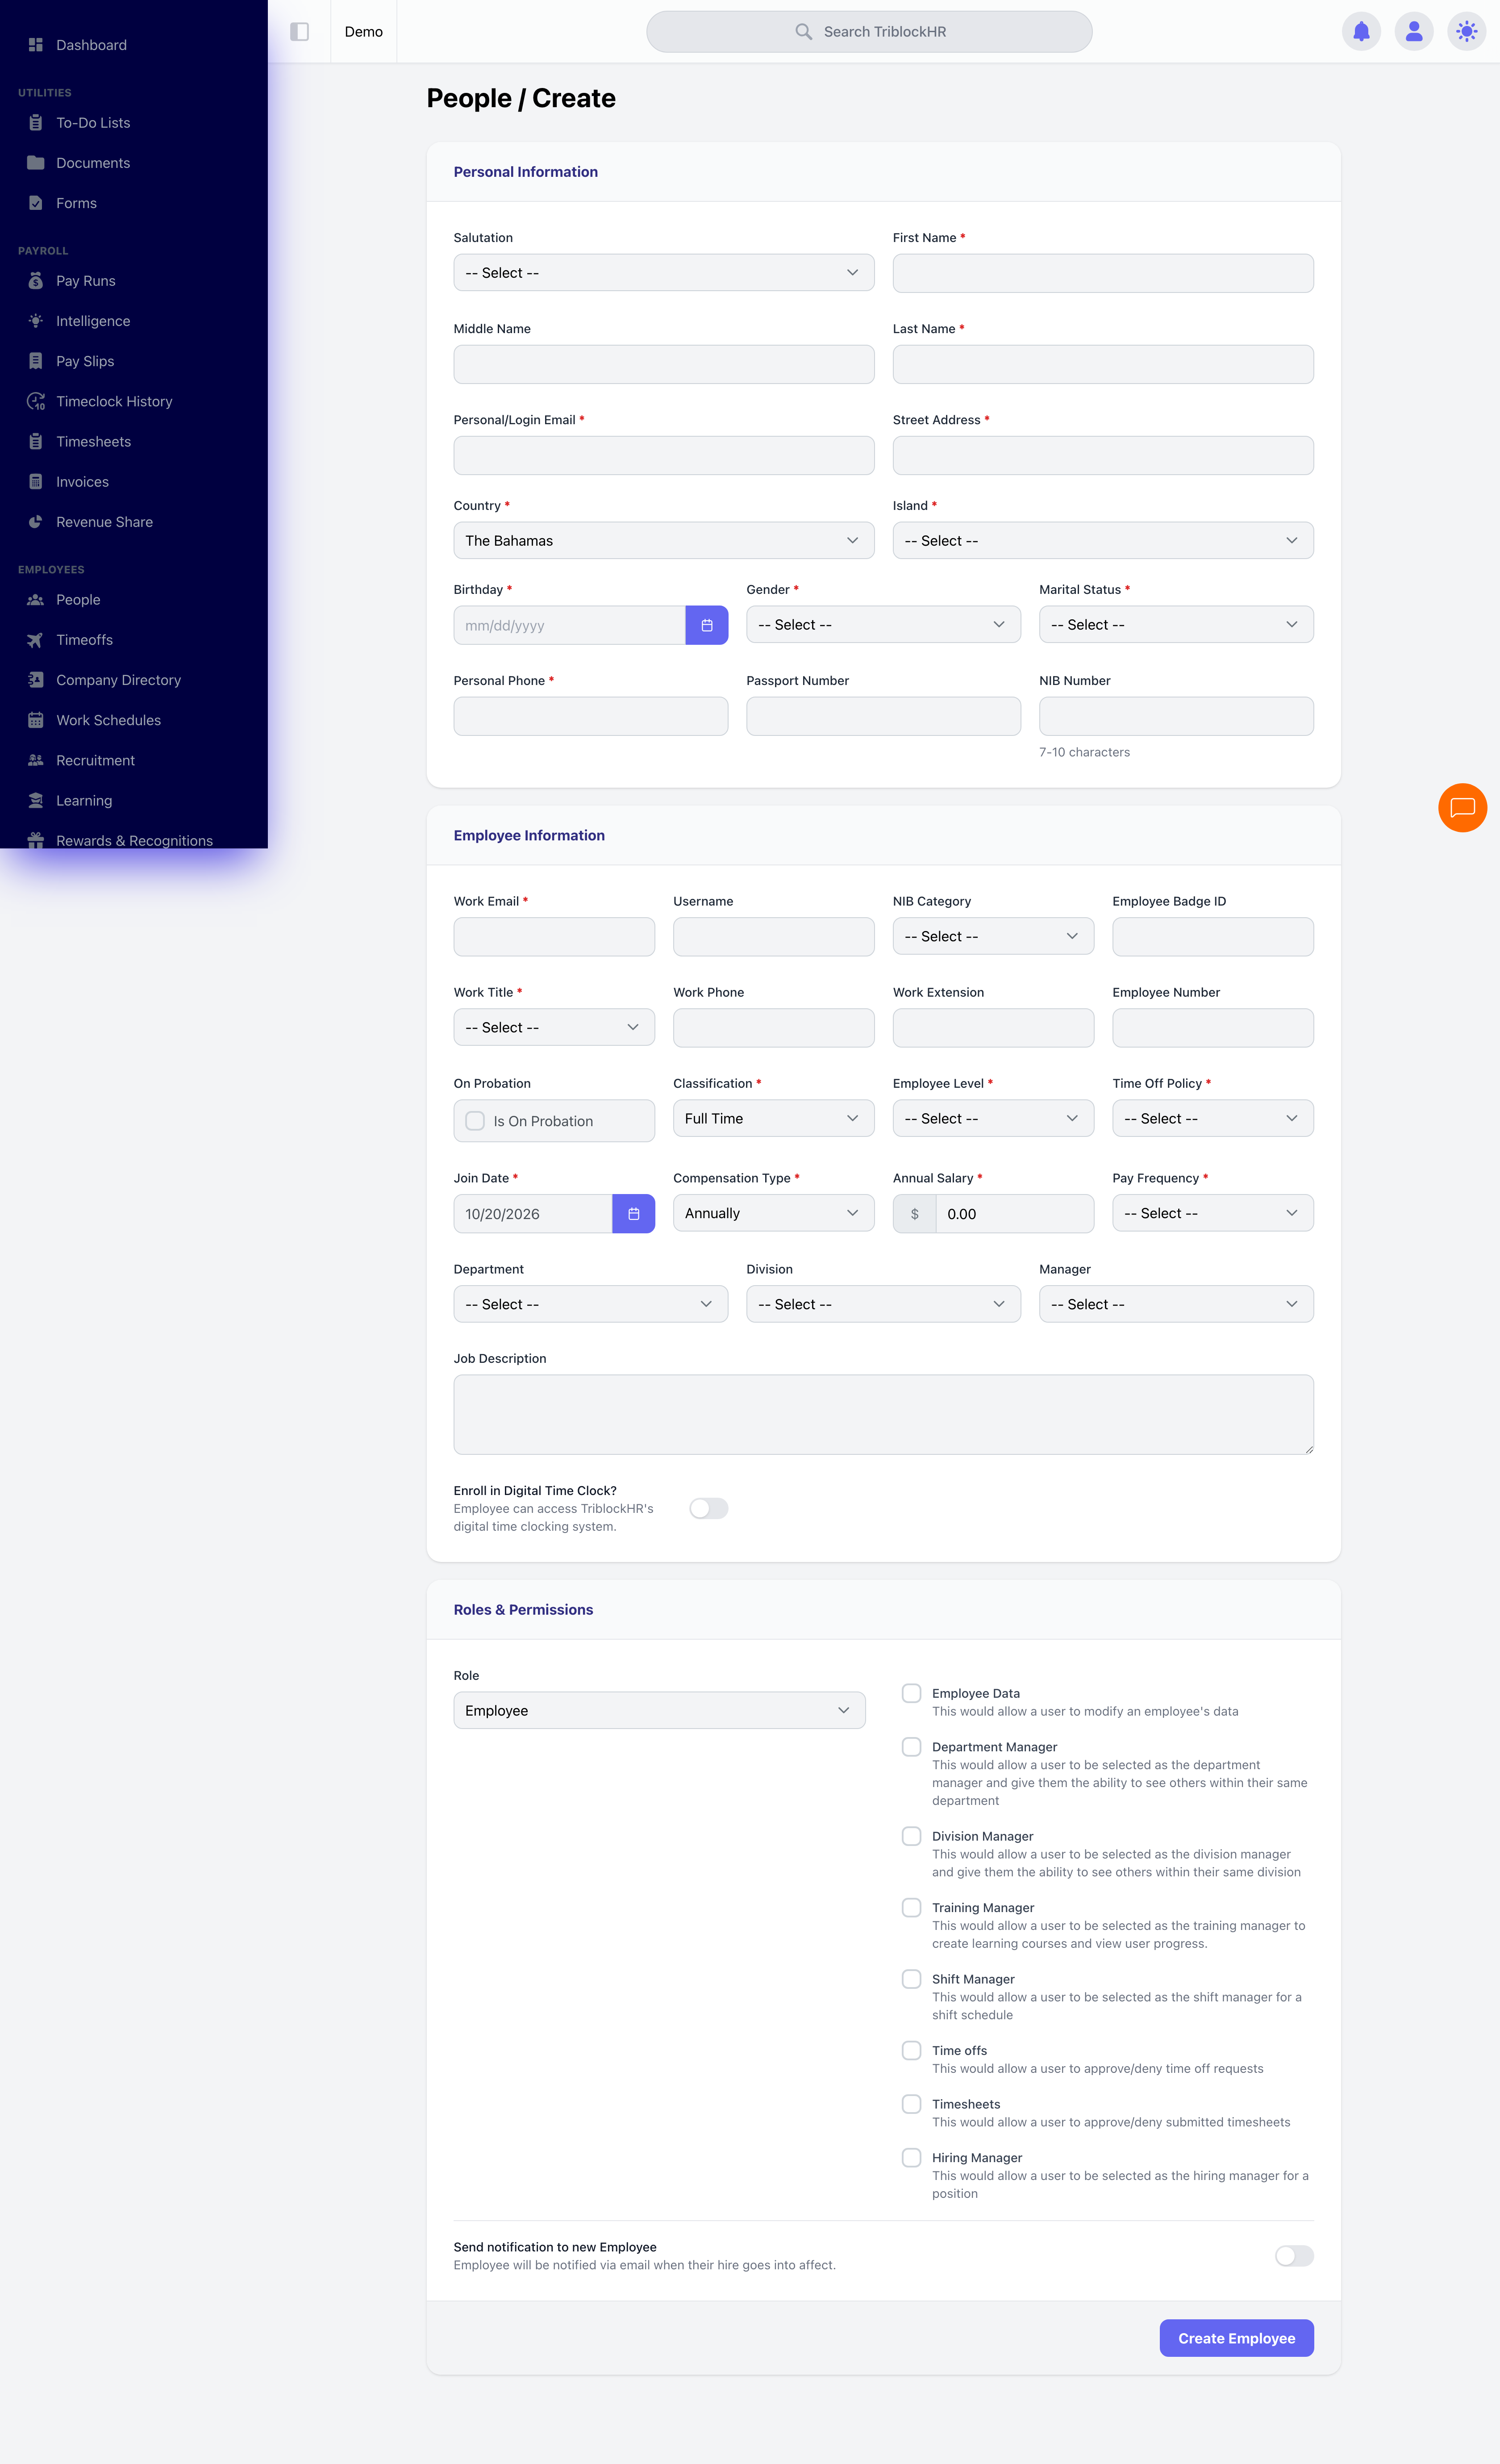
From People, click Create Employee. The form has three sections:
Personal Information
Name, login email, street address, country and island, birthday, gender, marital status, and phone are required; passport number is optional. If your payroll country needs tax identifiers, the fields appear here automatically — NIB number for the Bahamas, the TRN/NIS set for Jamaica, and so on — along with tax dependents where the jurisdiction uses them.
Employee Information
The employment essentials: Work Email, Work Title, Classification, employment level, and Time Off Policy are required. So is the compensation block: Join Date, Compensation Type (Annually or Hourly) with the matching salary or hourly rate, and Pay Frequency. Optional fields cover department, division, manager, employee number, badge ID, probation (with an automatic end date), and enrollment in the digital or hardware time clock.
Roles & Permissions
Pick the role, then tick any additional permissions it should carry. A Send notification to new Employee switch controls whether the person is emailed when their hire takes effect.
What happens on create
Submitting does more than insert a row. TriblockHR creates the person's profile and login, writes their first employment history entry (a "hire" record effective on the join date), stores tax identifiers, assigns your account's standard allowances and deductions starting from their employment date, applies role permissions, and — if they're hardware-clock eligible — queues their enrollment on the clock device. A future-dated join date works fine: the hire record simply takes effect on that date.
Getting them logged in
The welcome email carries a mobile login link for first sign-in. Onboarding itself is short and enforced: the new hire sees a welcome screen, clicks Get Started, sets a username (if they don't have one) and a password, and they're in — the system blocks access to everything else until this is done. If someone never received or lost the email, open their profile and use Resend Welcome Email from the ⋯ menu — the same menu has Send Mobile Login Link and Reset Password for later. Until onboarding completes, the profile shows a Not Yet Onboarded badge, and you're notified when it does (per your Notify Users configuration). Document collection, policy sign-offs, and first-week checklists aren't part of this flow — handle those with To-Do Lists and the employee's Documents tab.
Hiring an employee end to end (4–5 min)
Save as: admin-guide__people__creating-employees__vid1.mp4